Add data points
The fields you need to fill in depend on which interface the data point uses.
Written By Evolo Support
Last updated About 2 months ago
Here's how to do it
Go to Configuration and select Data Points.
Click Add Data Point.
Select the interface to which the data point belongs.
Enter the parameters needed to read the data point.
Click Read Data Point to verify that the value is being read correctly.
Create the data point.
You can also "import more data points" simultaneously from Excel.
KNX IP
Click here for an explanation of the various fields
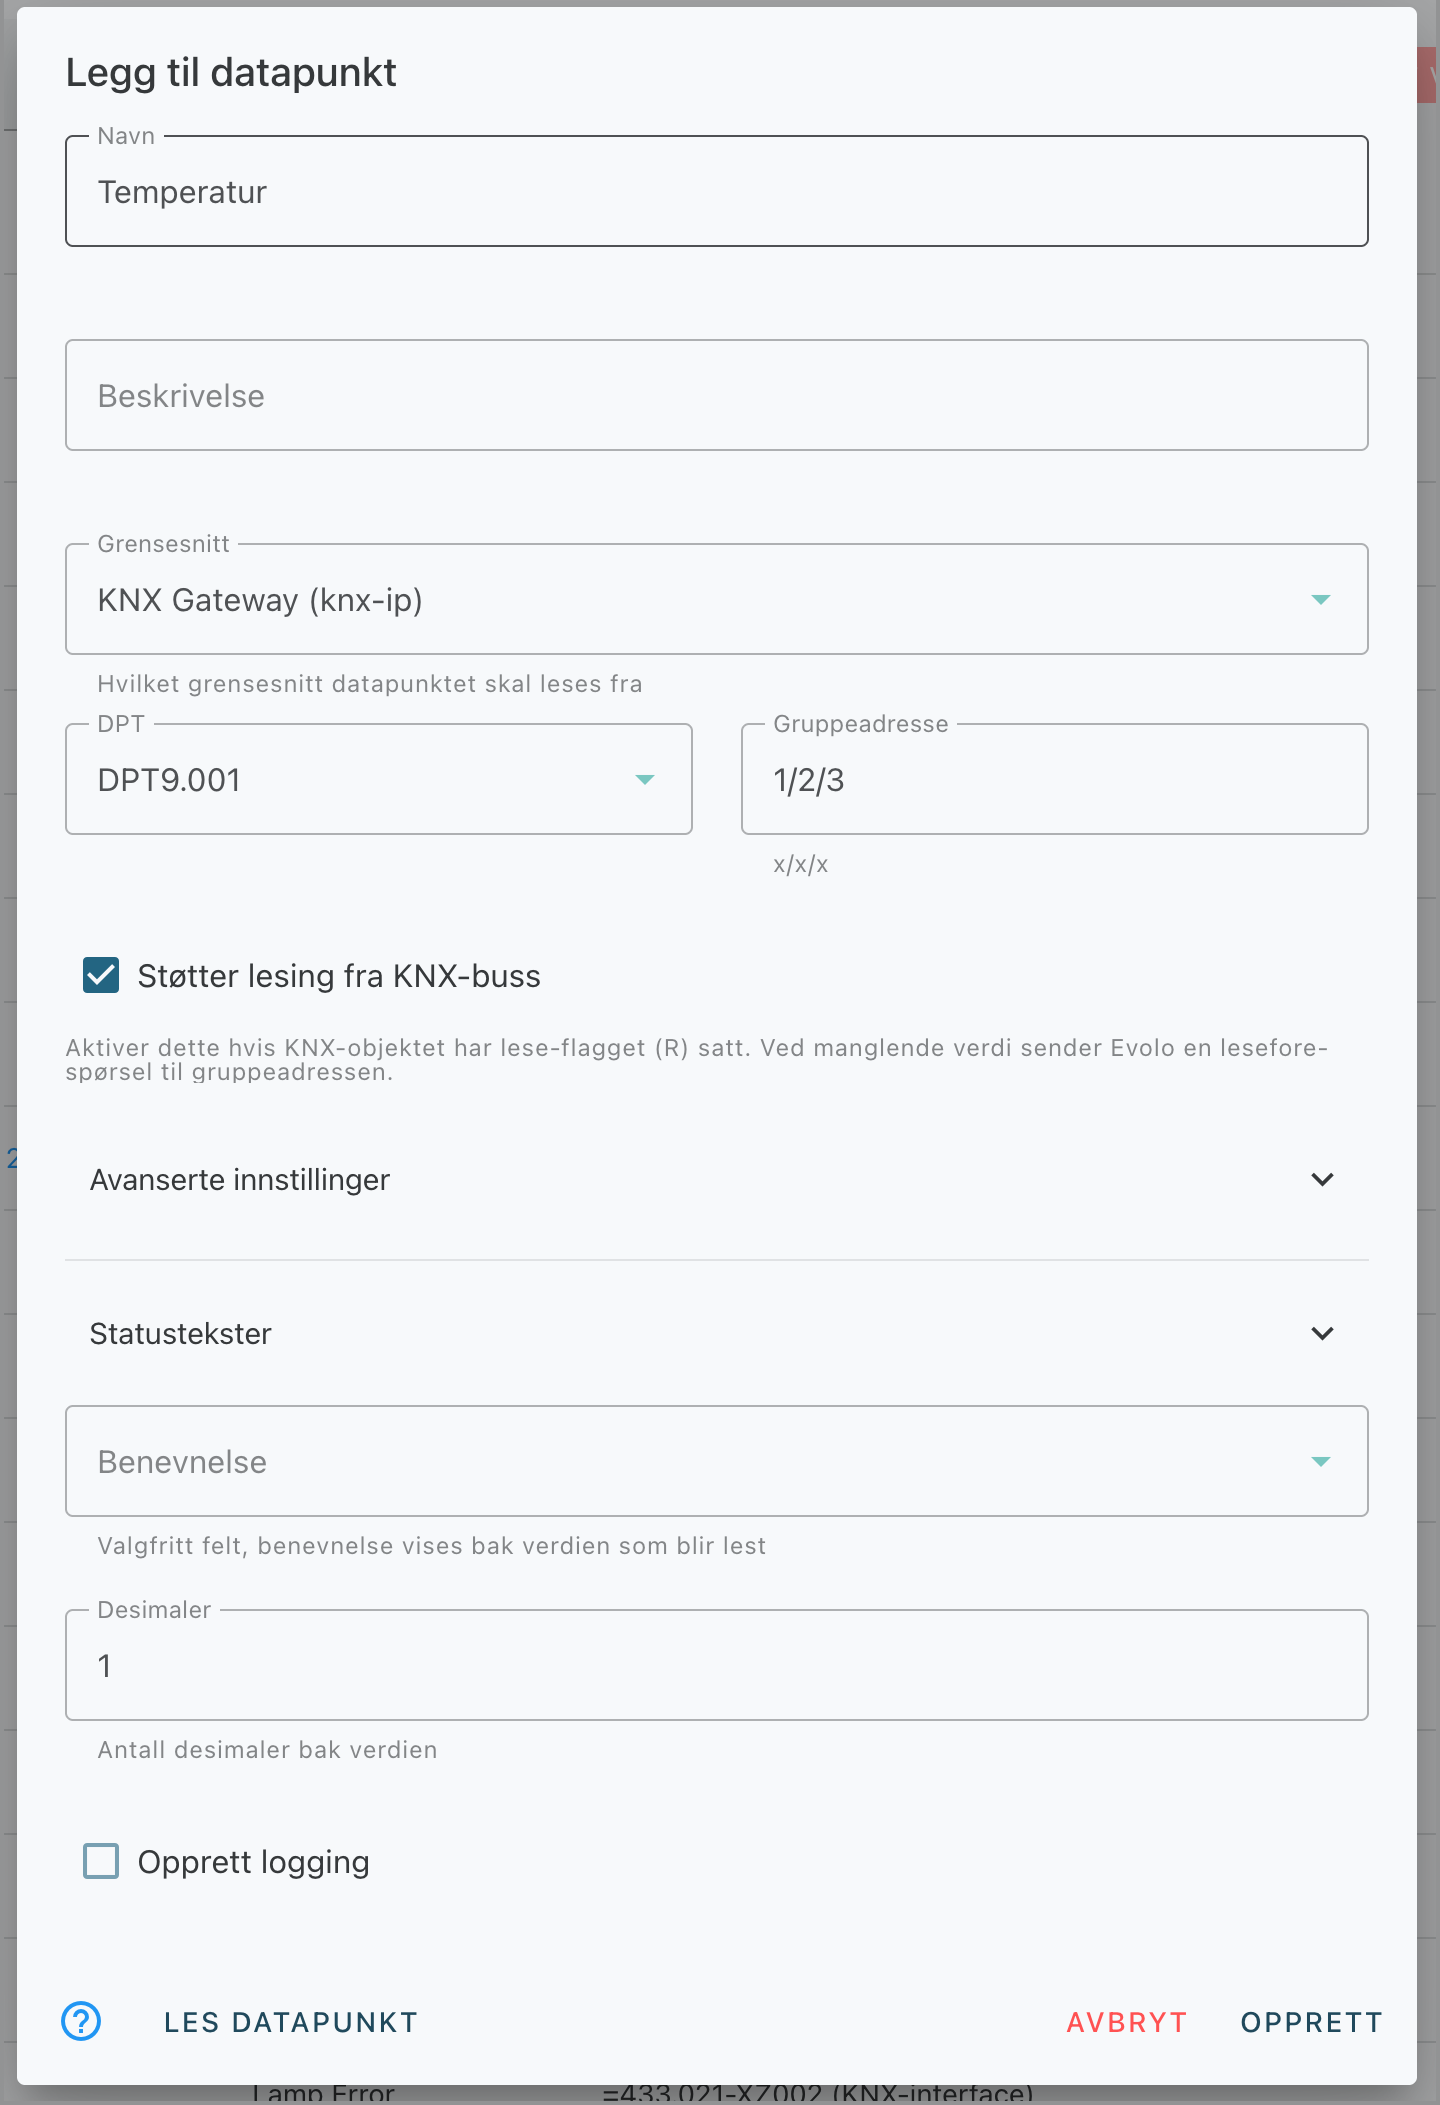
Supports reading from the KNX bus
KNX is an event-based bus. Evolo can send a ReadGroupAddress request if no updated data is available, but not all KNX devices support this by default.
Force a new read from the KNX bus
When this feature is enabled, the system will always send a request to the KNX bus to retrieve updated data—regardless of whether a value is already stored.
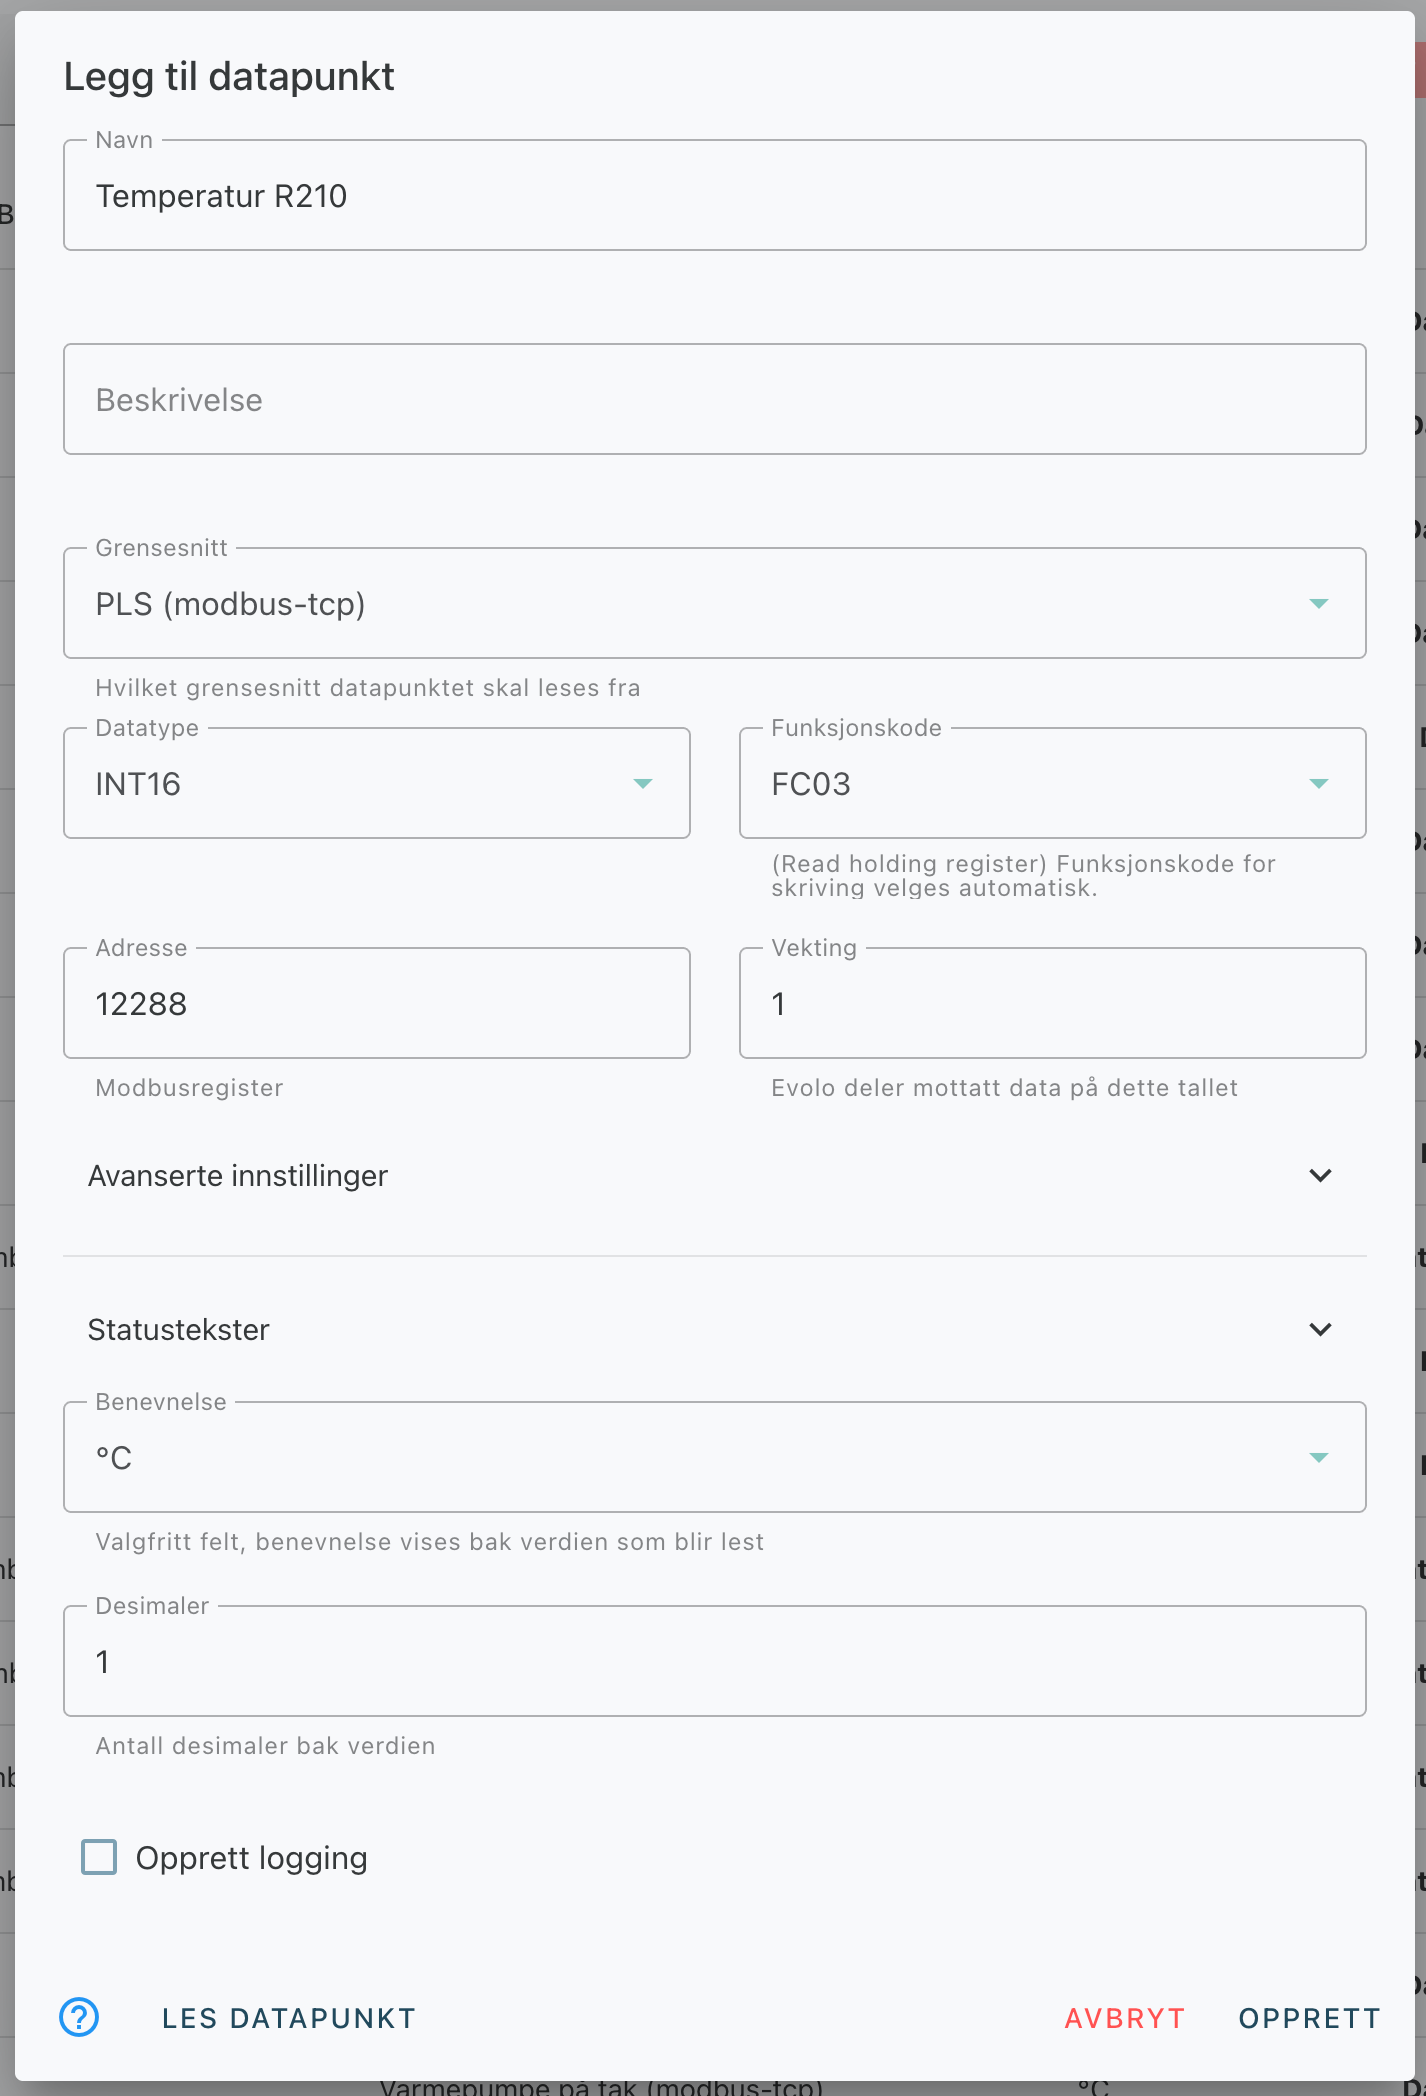
Modbus-TCP
Click here for an explanation of the various fields
MQTT
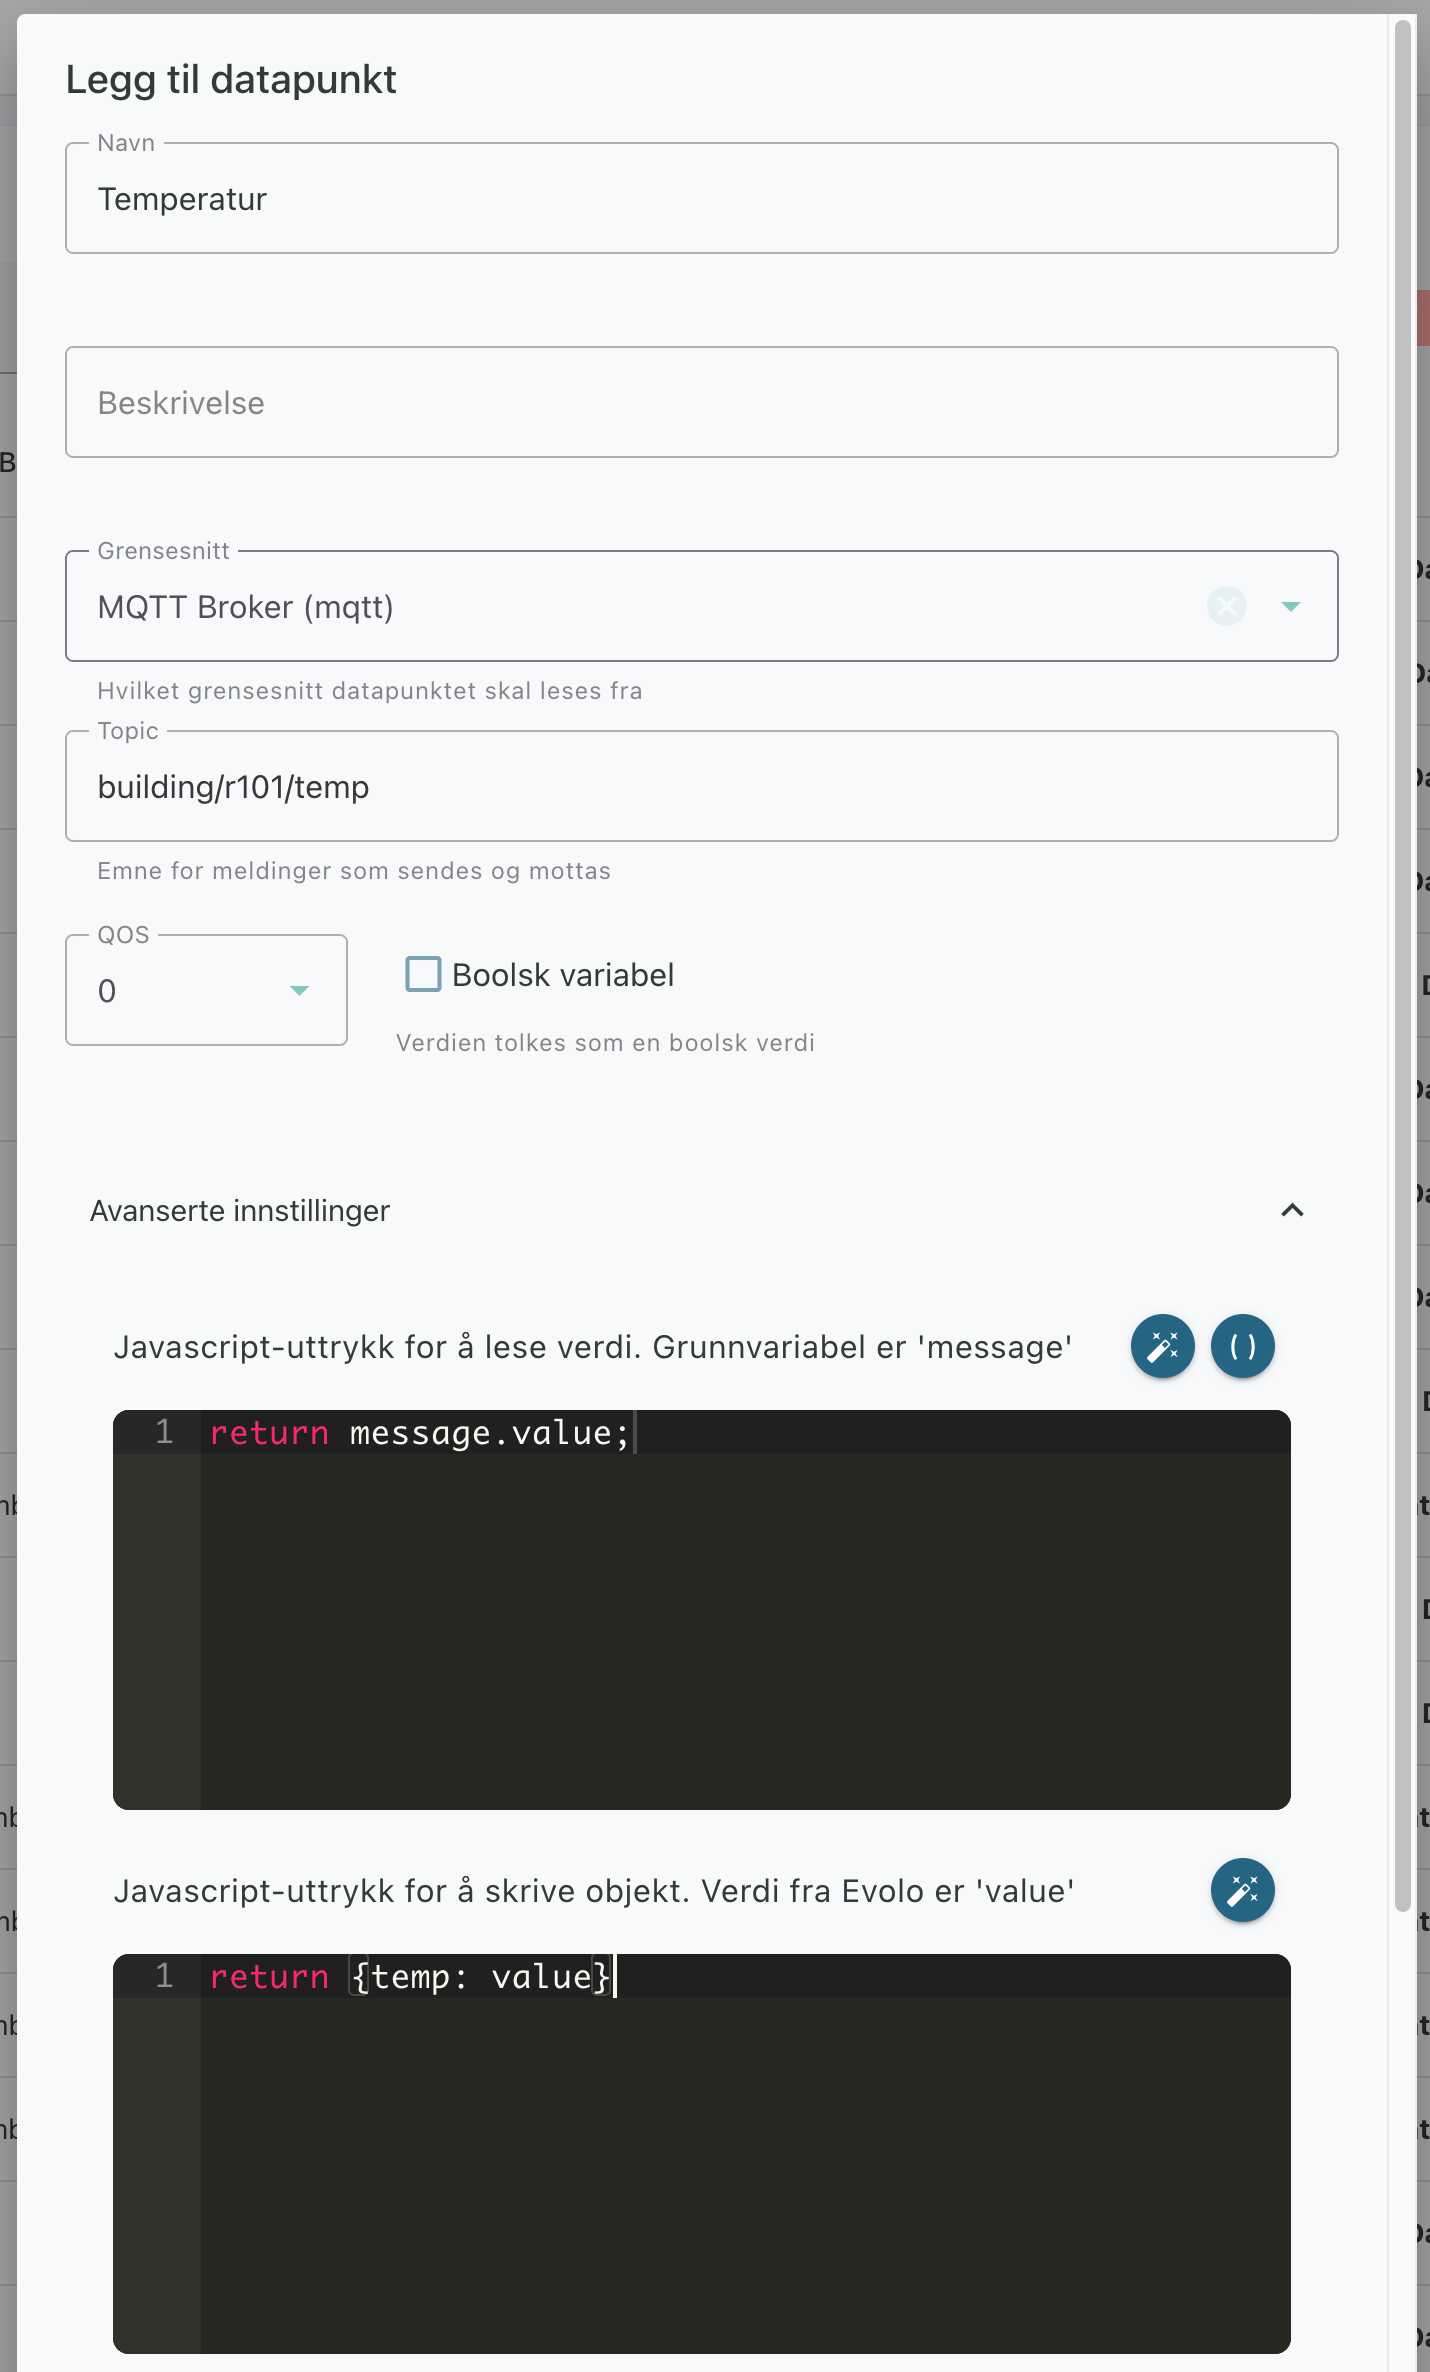
Topic
For MQTT, you must enter the full topic name of the variable you want to read.
Expression to read value
If the message contains multiple parameters, you can use an expression to retrieve the correct value, for example, `message.value`.
Expression for writing a value
You can also define your own expression for how data should be structured when writing to the topic.
BACnet
Click here for an explanation of the various fields
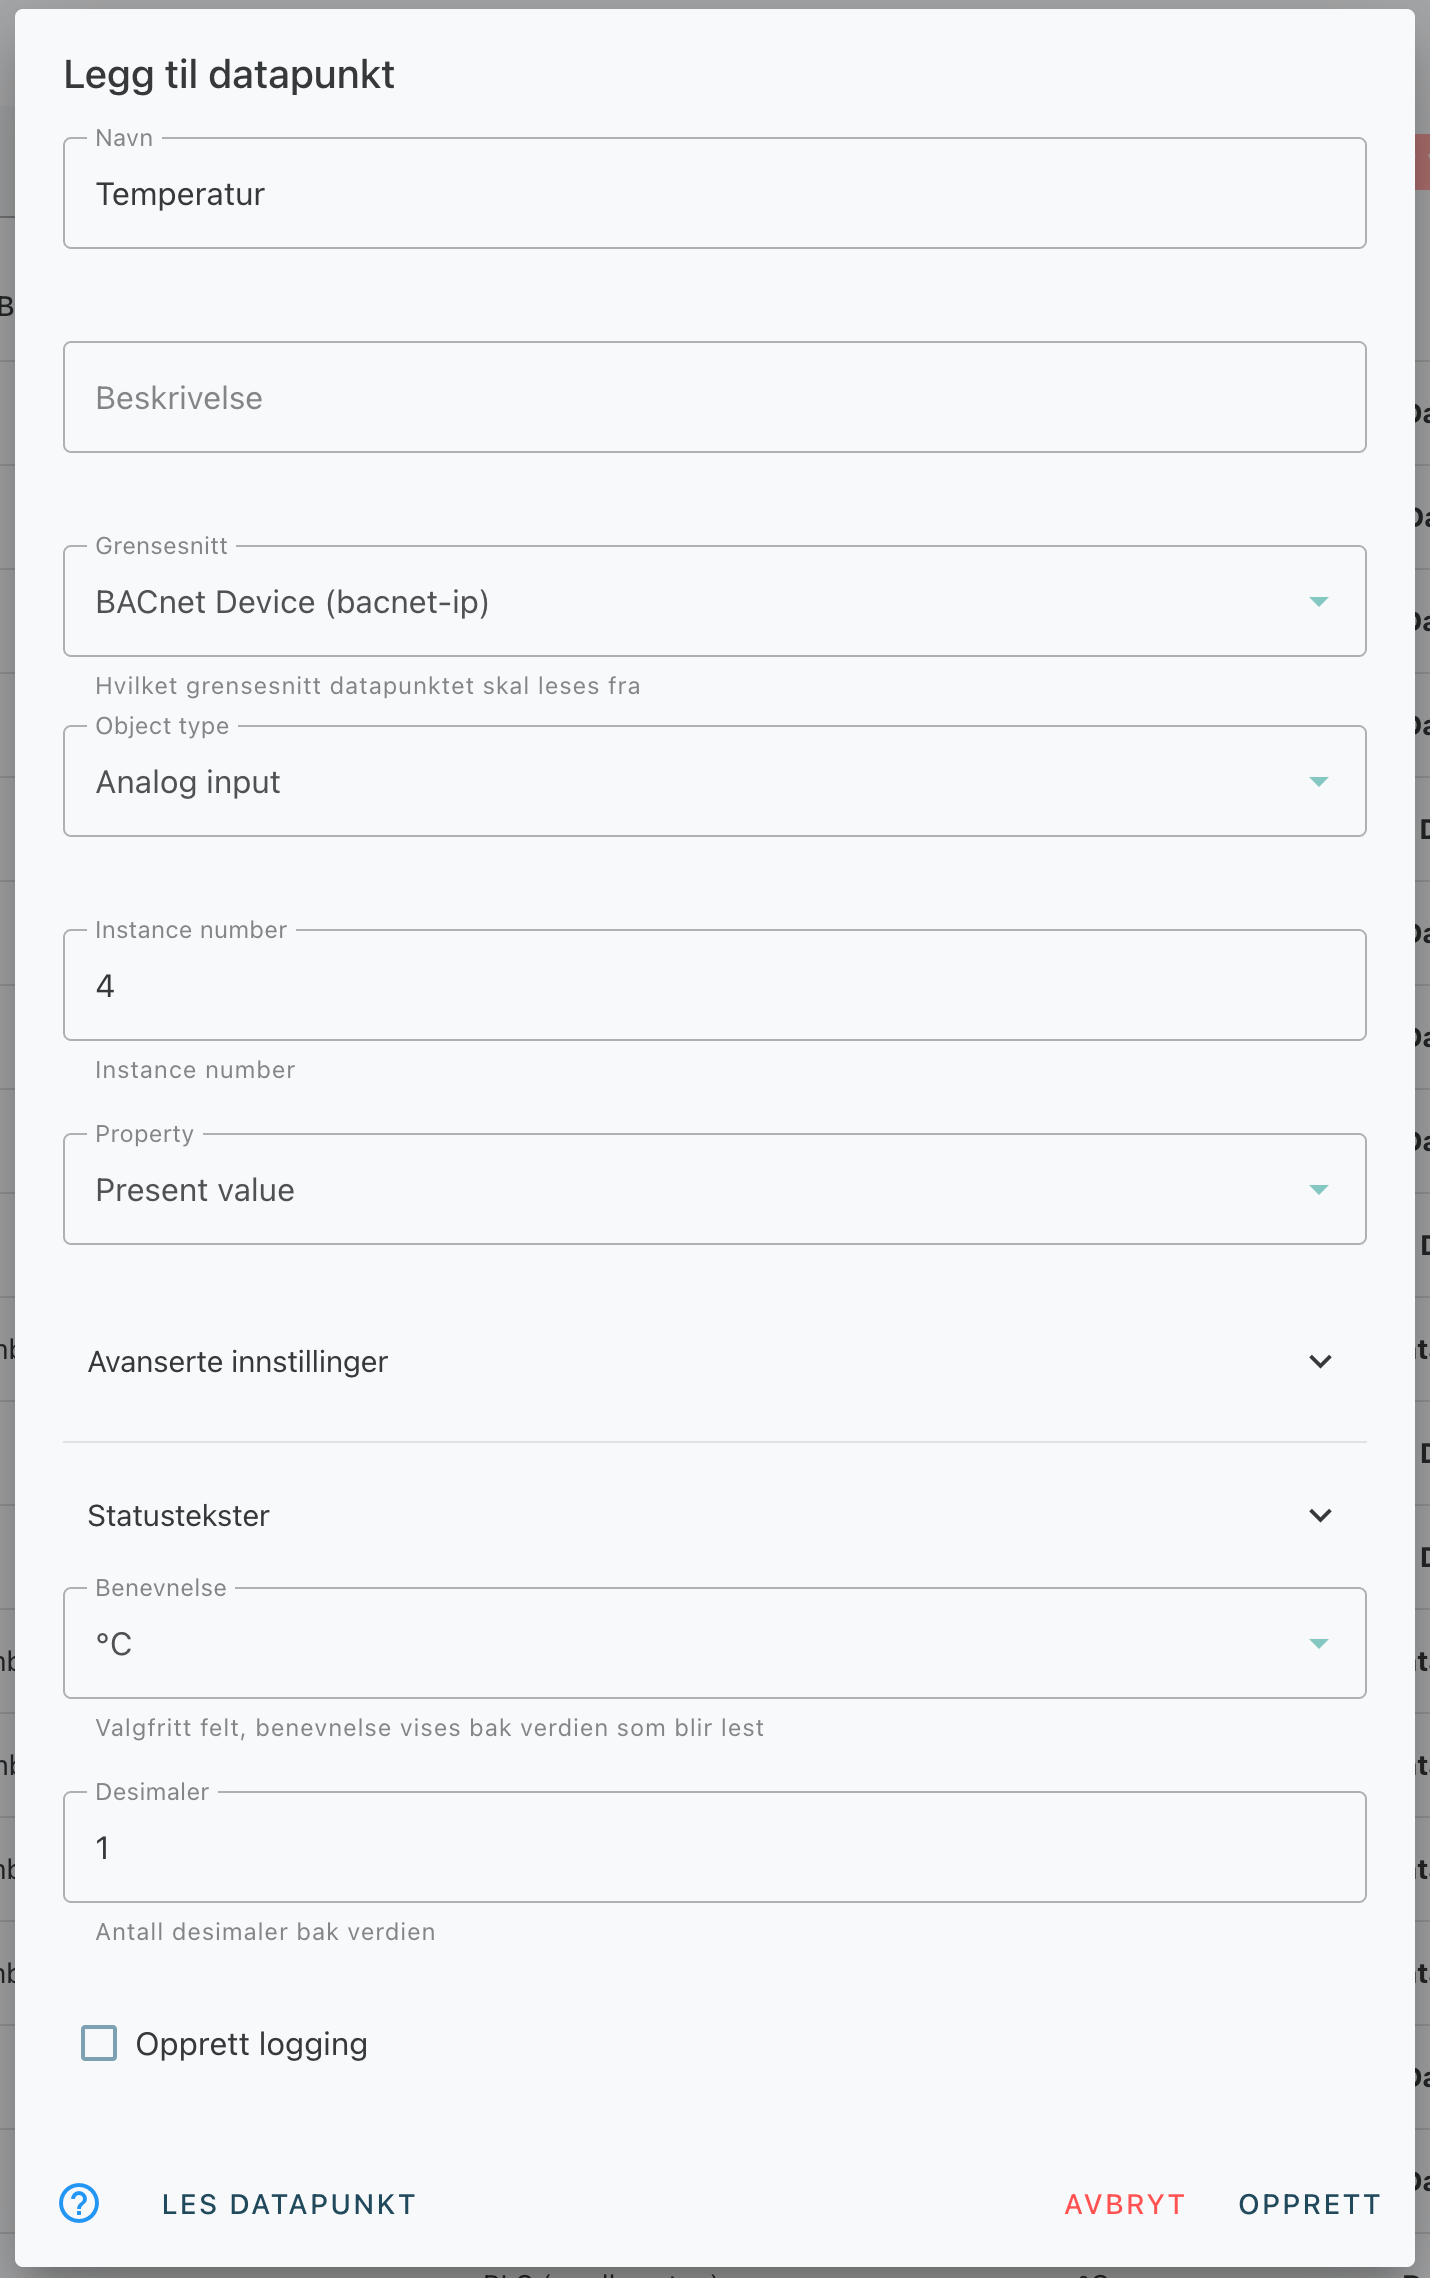
BACnet
Evolo Gateway supports BACnet for object discovery, reading and writing data points, reading BACnet notifications and alarms, and using BACnet with the calendar.
Priority
BACnet uses priority levels from 1 to 16, and Evolo uses priority 8 by default. This can be changed in the advanced settings.
OPC-UA
Click here for an explanation of the various fields
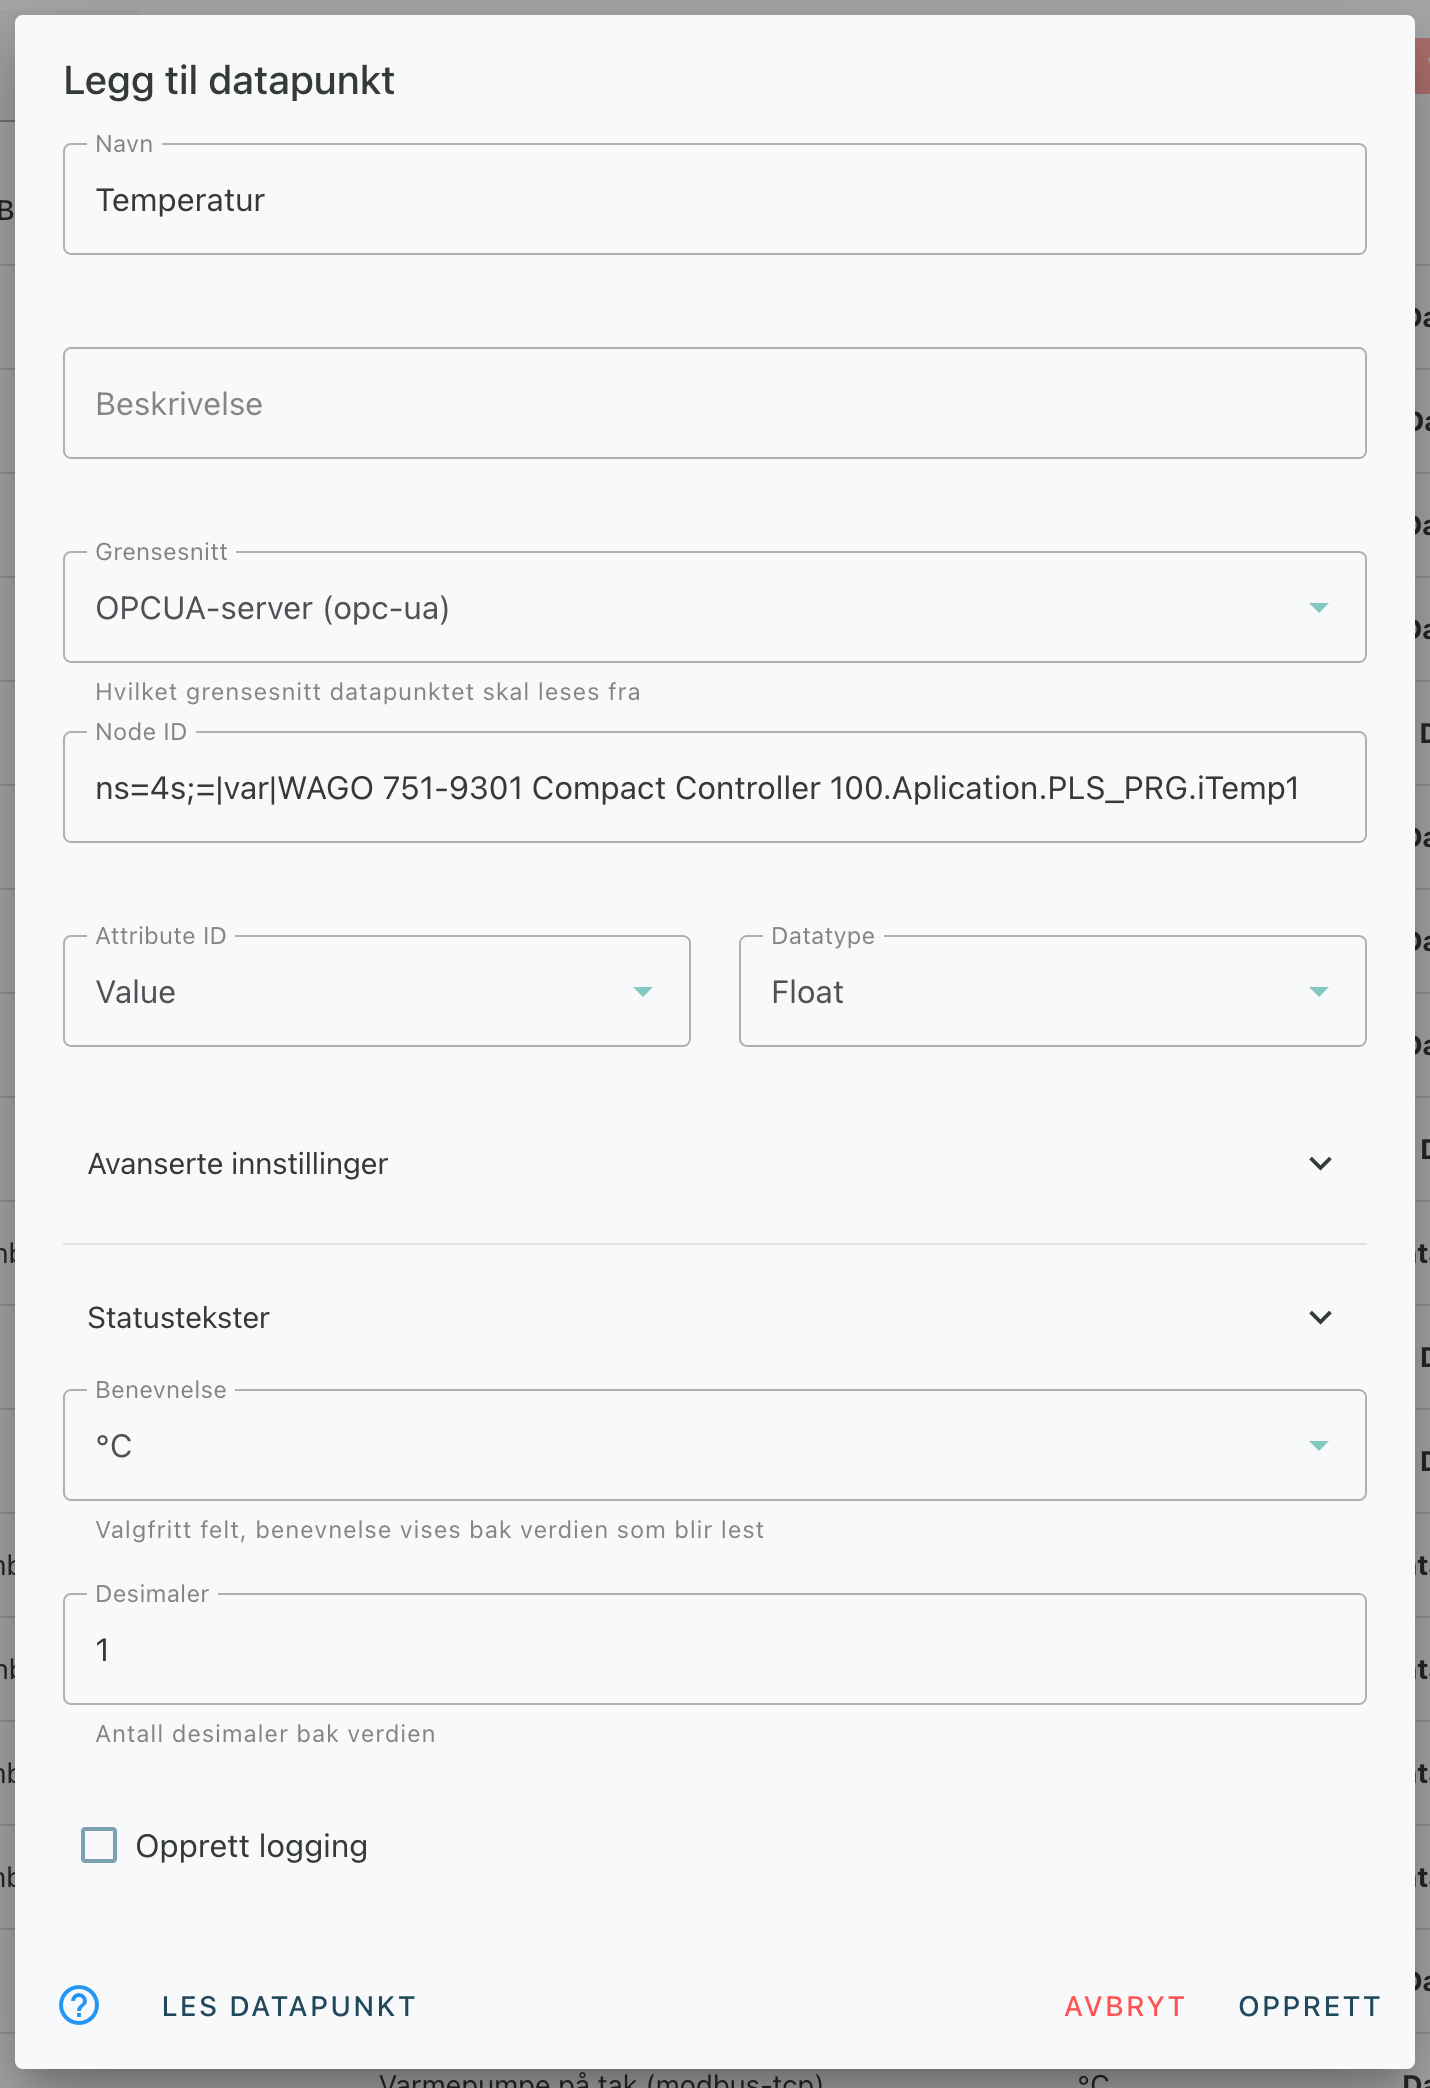
Attribute
Evolo Gateway supports reading and writing Value
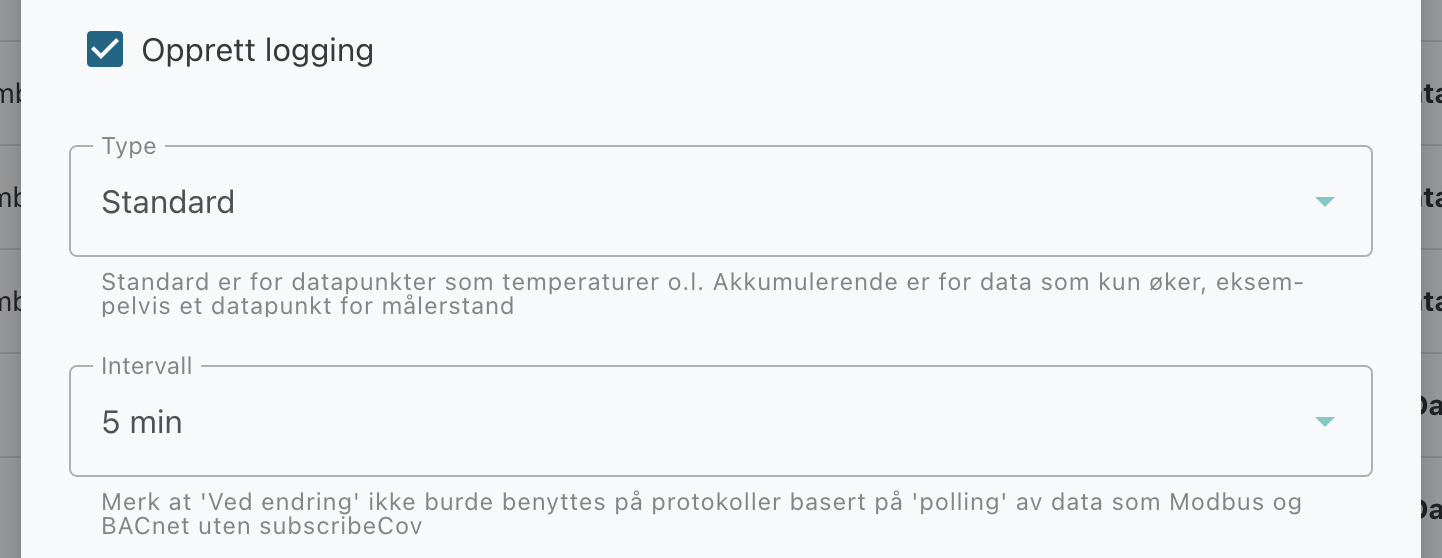
Logging on Creation
When you create a data point, you can simultaneously choose to enSet up logging. This saves you from having to add logging manually afterward.
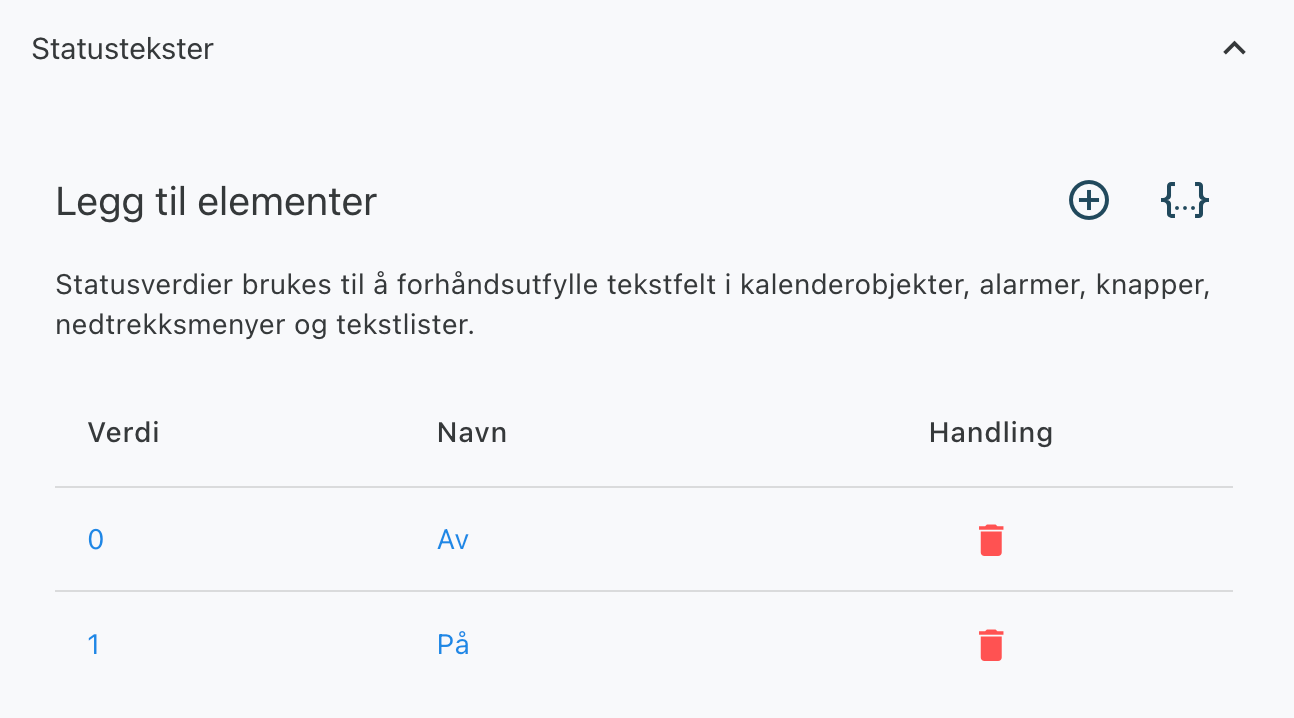
Status Texts
You can also add status texts for the data point. These can be used to pre-fill text fields in calendar objects, alerts, buttons, drop-down menus, and text lists in the view builder.
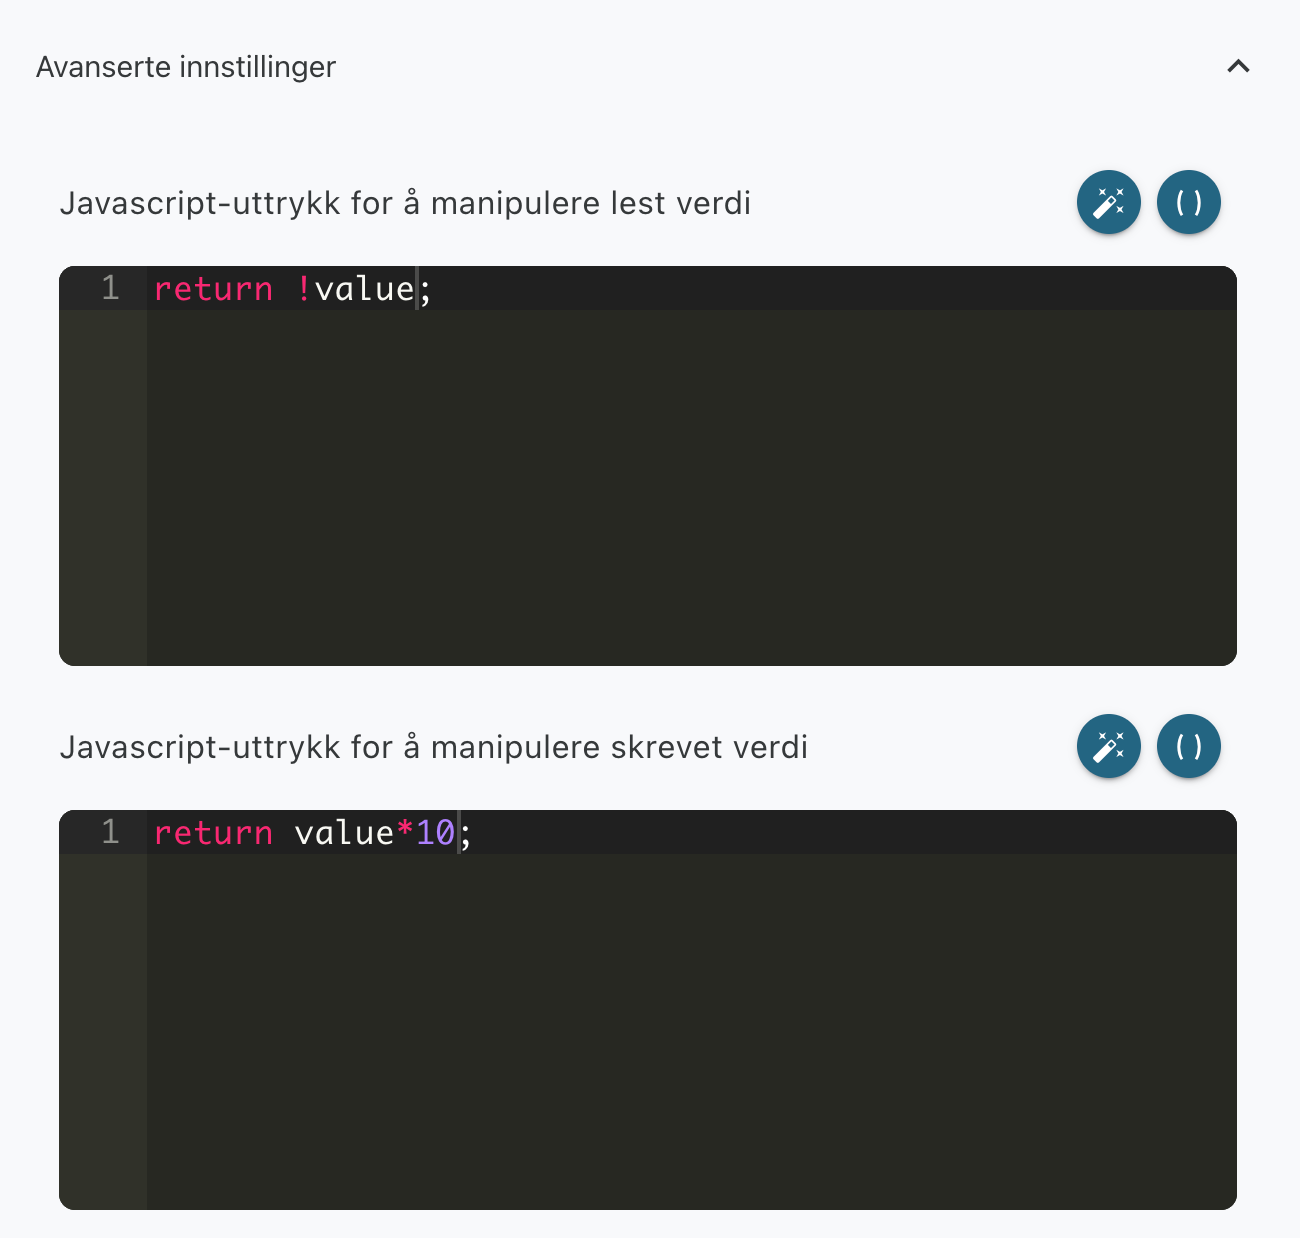
Advanced settings
In Advanced Settings, you can define a JavaScript expression to manipulate the read or written value.
Examples:
return !value;Flips a Boolean value.return value*10;multiplies the written value by 10 before it is sent out
Next step
Once the data point has been created, you can add it to logging → or use the data point further in views →, alarms →, or calendar r →
Still need help? Ask the team